
2026-10-21
Why do Komatsu excavator radiators crack at the core-to-header tank joints?
Core-to-header cracking in Komatsu excavator radiators usually traces to frame deflection, thermal cycling, mounting stress or a joint design that cannot tolerate the duty cycle.
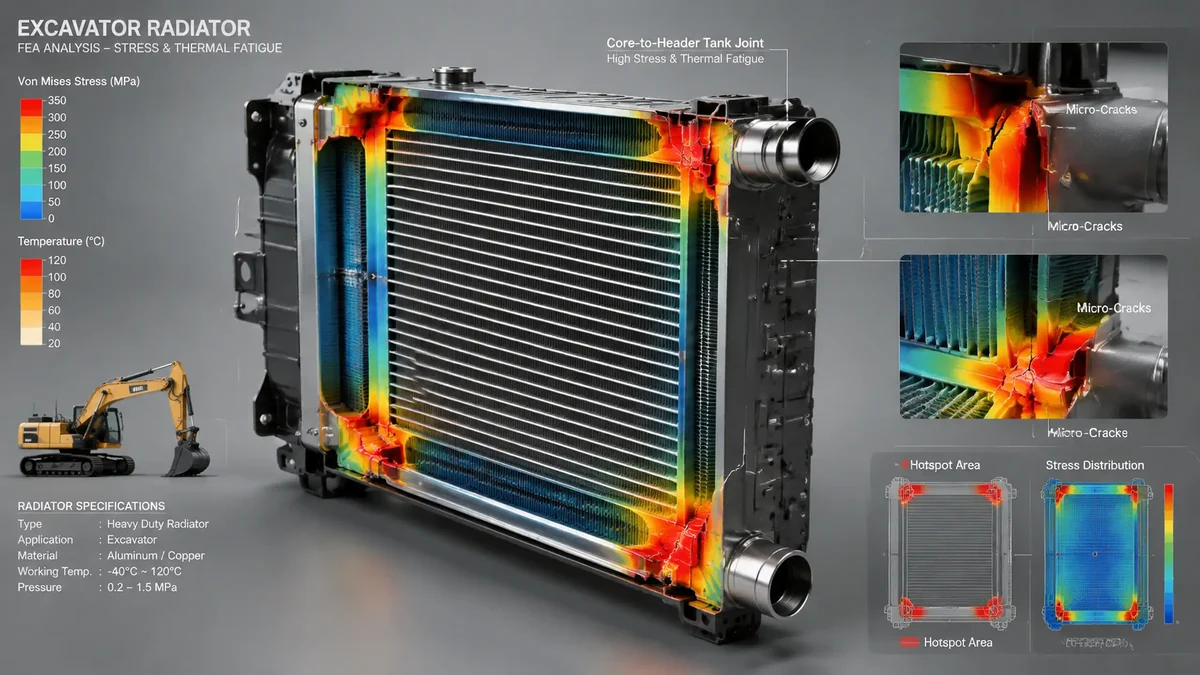
Figure 1: Stress concentration at a radiator core-to-header joint under torsional and thermal cycling loads.
Quick Answer: Cracks at a Komatsu excavator radiator core-to-header joint usually come from a load path that was not designed for the real machine duty. Frame deflection, thermal expansion, pressure cycling and vibration can all concentrate stress at the header-to-core connection. A replacement should match the mounting envelope and isolate the radiator from chassis movement; “fully TIG-welded” alone does not guarantee a durable joint.
A crack at the core-to-header joint is a useful clue. It is often mistaken for a poor weld, but the weld may simply be the point where a larger movement becomes concentrated. Before welding or replacing anything, establish whether the radiator is seeing frame twist, thermal shock, pressure pulses or a mounting problem.
This matters on mining and quarry excavators because the radiator is tied into a chassis that flexes under load. A replacement that copies the old core dimensions but keeps a rigid mounting arrangement can reproduce the same crack.
Start with the Crack Location
Clean the radiator and remove loose paint around the suspected area. A pressure test, dye penetrant or UV tracer can show the leak path. Record whether the crack is:
- At the core-to-header joint
- At a tube-to-header joint
- Along a tank seam
- At a mounting bracket foot
- At a hose neck or flange
The location changes the diagnosis. A crack at the bracket foot points to bracket or frame loading. A crack along the header seam points to joint design, thermal cycling or pressure. Multiple crack locations on the same radiator may indicate a mounting or vibration problem rather than a single bad weld.
Frame Deflection and Mounting Loads
Open-pit excavators operate on uneven ground, and the frame does not behave as a rigid block. When a radiator is mounted with solid brackets and the chassis twists, the radiator can be loaded as a structural member. The core-to-header joint then sees cyclic bending and shear.
Inspect:
- Side brackets and their welds
- Isolator condition and compression
- Bolt torque and sleeve fit
- Clearance between the radiator and frame
- Hose strain at the inlet and outlet
- Fan shroud attachment and clearance
- Signs of movement or fretting around the mounts
Replacing a failed radiator without correcting a loose bracket, a collapsed isolator or a hose that pulls on the port will shorten the life of the new unit. The radiator should be supported and isolated, not clamped rigidly into a flexing frame.
Thermal Expansion and Pressure Cycling
The header and the core do not reach the same temperature at the same time. During a cold start, the coolant enters the header before the full core is at operating temperature. During a hard load change, the engine heat rejection rises quickly while the cooling airflow and coolant flow respond more slowly.
That temperature difference creates differential expansion at the header-to-core joint. The pressure cap and cooling-system pressure add another cyclic load. A weak cap, a blocked vent, a thermostat problem or a coolant mixture that allows boiling can make the pressure cycle worse.
Check the cooling system before blaming the joint:
- Pressure-cap rating and condition
- Thermostat opening and coolant flow
- Coolant concentration and inhibitor level
- Air pockets or poor bleeding
- Fan operation and shroud clearance
- Radiator core blockage or external dust
A radiator that has run hot for a long period may already have distorted the header or softened the joint area. Welding a crack in a distorted header rarely restores a reliable pressure boundary.
Joint Construction and the TIG-Welding Question
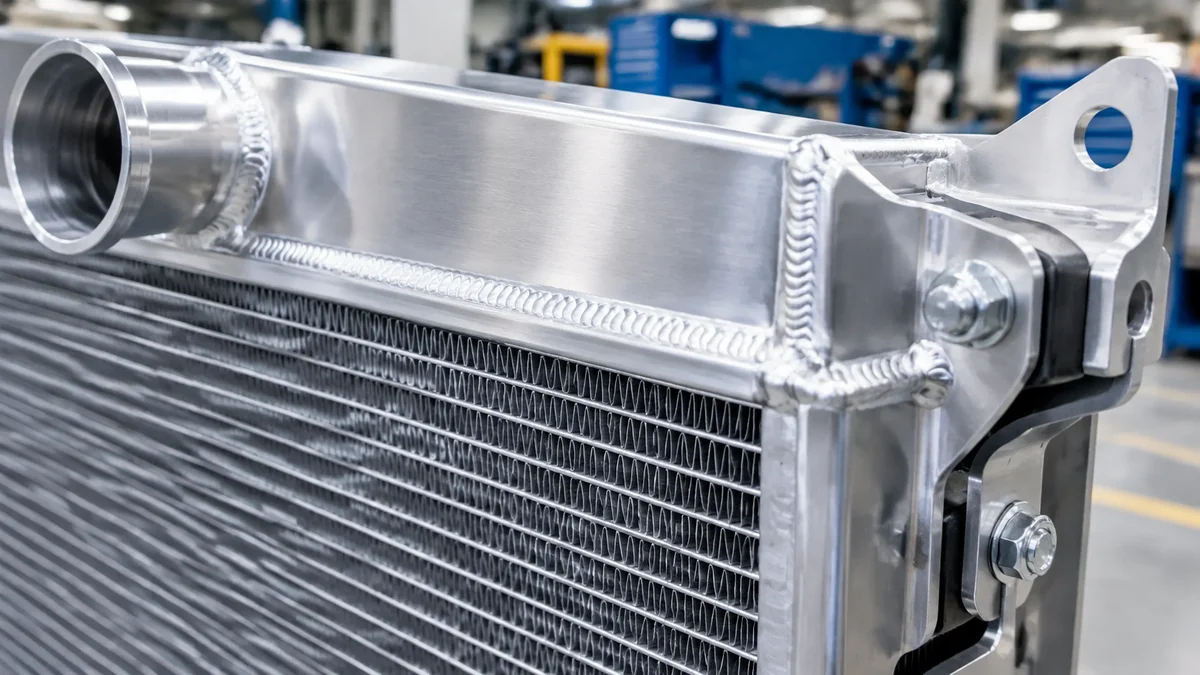
A heavy-duty aluminium radiator is usually a combination of processes, not one process applied to the entire assembly. The core may be vacuum-brazed, while tanks, flanges and brackets are TIG-welded. The joint between the core and tank must be designed for the pressure and vibration loads, and the mounting must allow the assembly to move without turning the joint into a hinge.
A “fully TIG-welded bar-and-plate radiator” is therefore not a complete specification. The correct questions are:
- What is the core construction?
- How is the tank or header joined to the core?
- Is the joint reinforced for pressure cycling?
- Are the brackets isolated from chassis vibration?
- Has the design been pressure- and vibration-tested?
A qualified TIG weld can be an excellent repair or production method where the alloy, access and procedure allow it. It does not compensate for a rigid mounting system or a core that is already distorted.
Repair or Replace the Radiator?
A repair can be considered when the crack is accessible, the alloy is known, the core is not warped, the header is not deeply corroded and a qualified welding procedure can be applied. The repair should include a pressure test and a check of the mounting and cooling system.
Replacement is usually the better route when:
- The crack has returned after a previous repair
- The core or header is distorted
- Corrosion has reduced the joint thickness
- The leak path is difficult to access
- The radiator has no reliable pressure-test history
- Downtime is more expensive than the replacement
For a machine-specific replacement, review the Komatsu hydraulic oil cooler, the plate-fin hydraulic oil cooler or the broader excavator cooling range. The CAT copper-to-aluminium radiator guide shows the fitment and pressure checks used for a similar replacement review.
Replacement Specification Checklist
| Item | What to confirm |
|---|---|
| Machine fit | Komatsu model, serial number, original part number and mounting dimensions |
| Core | Bar-and-plate or reinforced tube-and-fin construction, pressure and airflow rating |
| Tank and joint | Brazed or TIG-welded construction, reinforcement and pressure-test method |
| Mounting | Isolators, bracket design, bolt torque and hose movement |
| Coolant | Specification, concentration and compatibility with aluminium |
| Pressure | Cap rating, operating pressure, pressure test and any oil-side pressure requirement |
| Service access | Fan shroud, cleaning access and drain or vent connections |
For combined radiator and oil-cooler packages, keep the cooling-system pressure and the oil-side pressure requirements separate. A radiator cap does not define the pressure rating of an oil cooler, and a high oil-side test pressure should not be applied to the cooling system.
Installation and First Heat Cycle
After fitting the replacement:
- Confirm hose and bracket alignment before tightening.
- Fill with the specified coolant and bleed the system.
- Check fan direction and shroud clearance.
- Bring the machine to operating temperature under controlled load.
- Check the header, core joints and hose connections for leaks.
- Recheck isolator compression and bolt torque after the first heat cycle.
- Record coolant temperature and any repeated pressure loss.
A successful static pressure test is only the first part of validation. The radiator must also survive the thermal cycle and the machine vibration that caused the original crack.
What to Send for a Komatsu Radiator Review
Send the following to evaluate a replacement:
- Machine model, serial number and original part number
- Photos of the radiator, side brackets, isolators and hose connections
- Core and tank dimensions, including cross-pin centres
- Coolant type, system capacity and pressure-cap rating
- Operating temperature history and pressure-test results
- Ambient, dust and vibration conditions
- Required delivery date and quantity
Our engineers can review the mounting envelope, joint design and cooling duty against your machine and provide a practical replacement route.
FAQ
Why do Komatsu excavator radiators crack at the core-to-header joint?
The joint can crack when frame deflection, thermal expansion, pressure cycling and vibration produce repeated stress at a rigid connection. A weak joint design, poor bracket isolation or a coolant system running above its normal pressure can accelerate the failure.
Is a fully TIG-welded radiator always better than a brazed radiator?
No. The core and tank use different joining processes for different reasons. A heavy-duty replacement may use a vacuum-brazed bar-and-plate core with TIG-welded tanks, flanges and reinforced joints. The construction must suit the pressure, vibration and repair requirements.
Can the cracked joint be repaired instead of replacing the radiator?
A repair may be possible if the crack is accessible, the alloy is suitable, the core is not distorted and a qualified welding procedure can be applied. If the core or header is distorted, corroded or repeatedly cracked, replacement is usually more reliable.
How can I reduce radiator joint stress on a mining excavator?
Check the isolators, bracket condition, hose alignment, fan shroud clearance and pressure cap. Correct frame-related movement and thermal cycling where possible, and specify a replacement with a reinforced joint and mounting system for the actual duty.
What information is needed for a Komatsu radiator replacement quote?
Provide the machine model, serial number, original part number, photos of the radiator and mounting points, core dimensions, hose port positions, coolant type, cap pressure and the operating environment.
Need a Komatsu Radiator Crack and Fitment Review?
Send the machine model, photos of the cracked joint, mounting brackets and hose connections. We will review the load path, replacement envelope and pressure-test requirements before quoting a suitable radiator.
Request a Komatsu Radiator Replacement Review
Need Help Selecting an Oil Cooler?
Send us your specs or drawings and our engineers will size the right cooler for you within 24 hours.
Get a Free Quote Chat on WhatsApp